NSFOCUS WAF obtains IP Reputation Data Feed from NSFOCUS Threat Intelligence (NTI). NSFOCUS WAF IP Reputation can get the list of IP addresses that have earned a negative reputation through involvement in suspicious activity, including phishing attacks, spam, botnets, DDoS attacks, APT attacks, and more. NSFOCUS WAF will filter high-risk IP addresses from IP Reputation Data Feed and add those IP addresses to the blacklist engine.
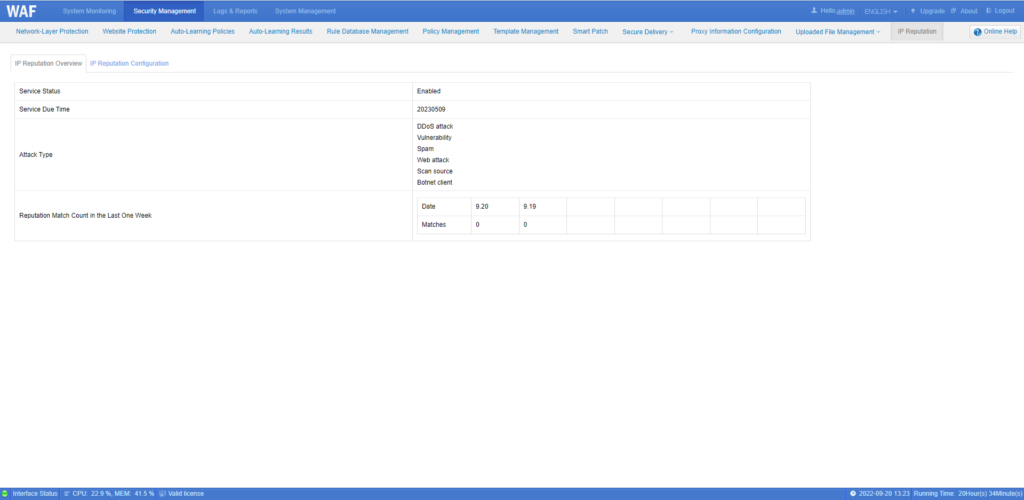
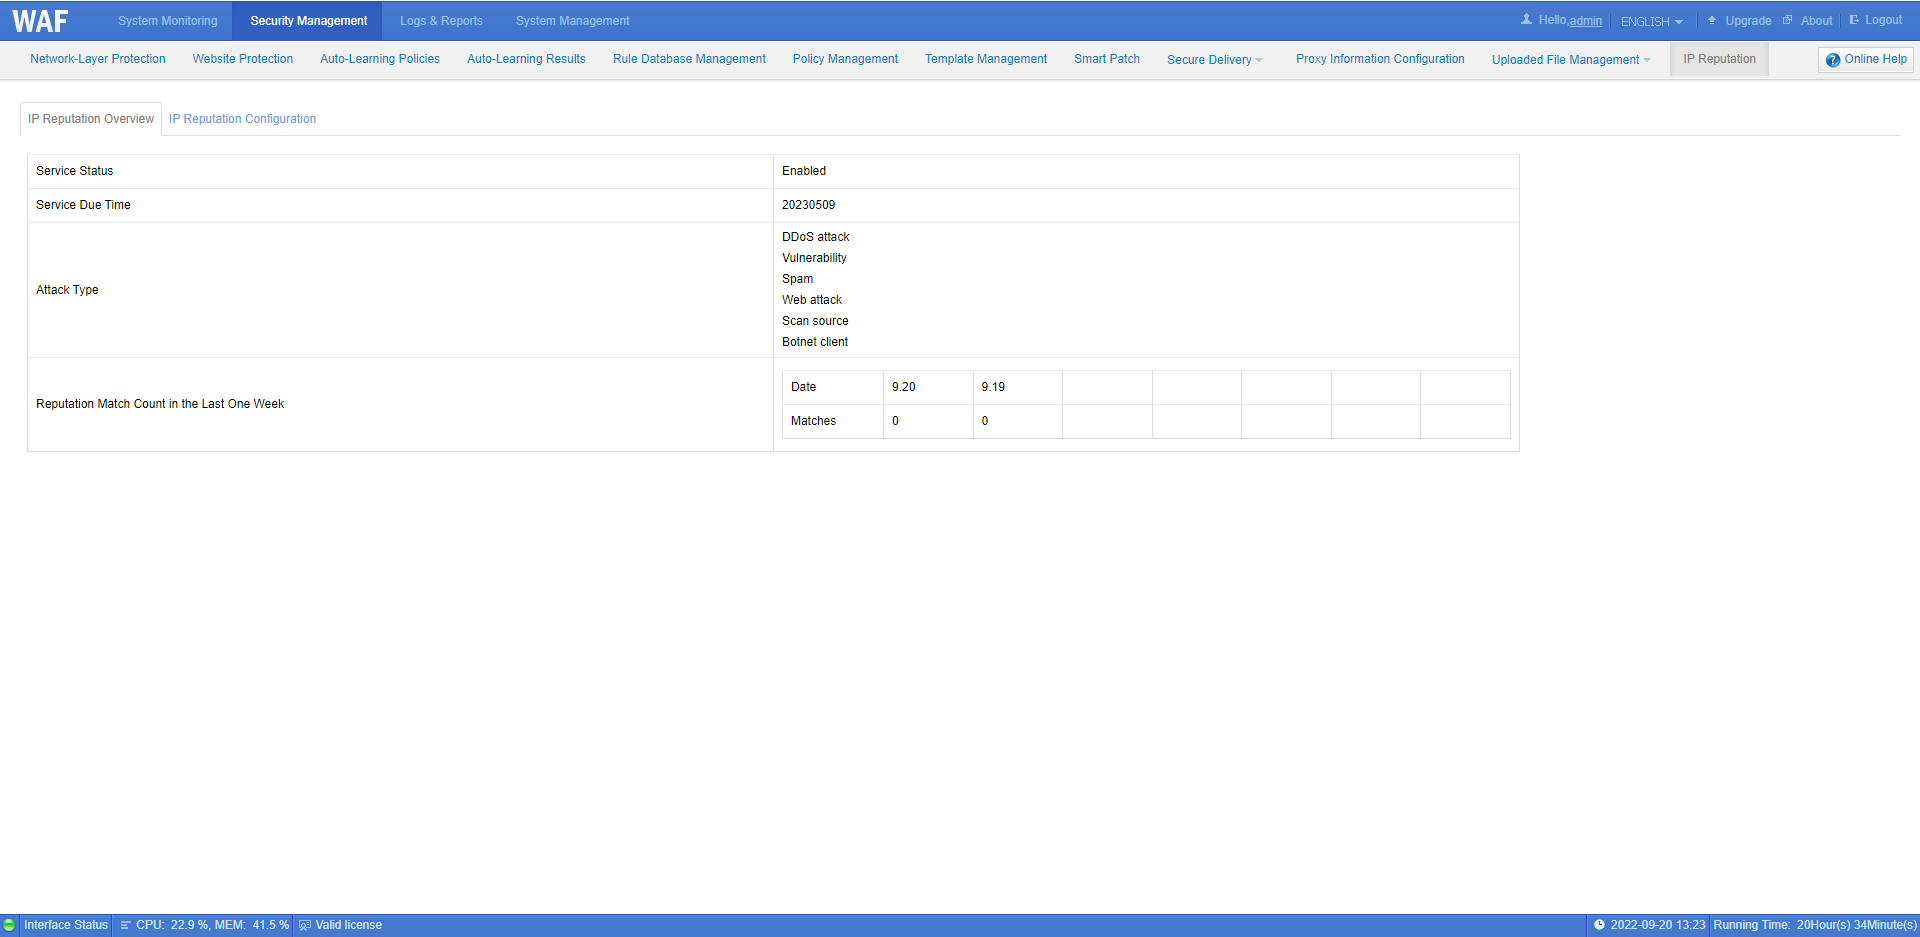
IP Reputation Overview displays Service Status, Service Due Time, Attack Type and Reputation Match Count in the Last One Week.
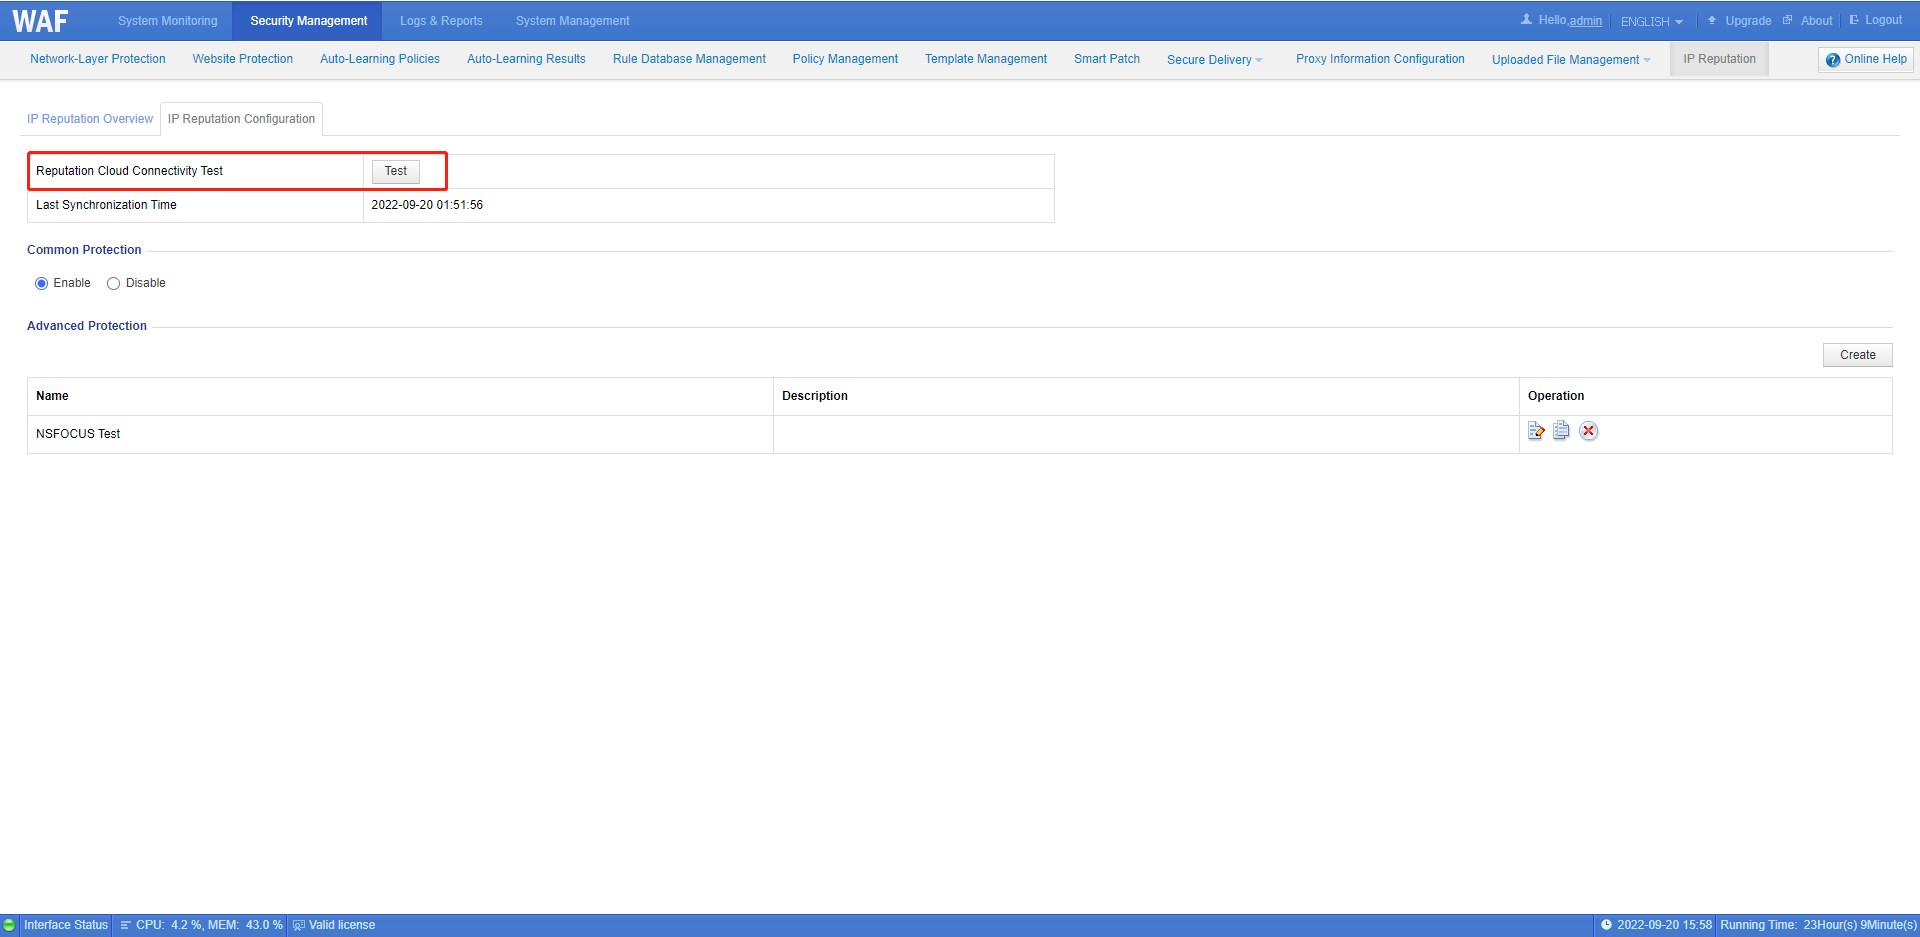
IP Reputation Configuration displays the Last Synchronization Time which is the Local time when IP Reputation Data Feed is last obtained from NTI. IP Reputation Data Feed has a validity for 24 hours. The “Reputation Cloud Connectivity Test” button can help check the connection between NSFOCUS WAF and NTI to troubleshoot the update failure. Generally, the connection failure is caused by incorrect DNS configuration or network exception.
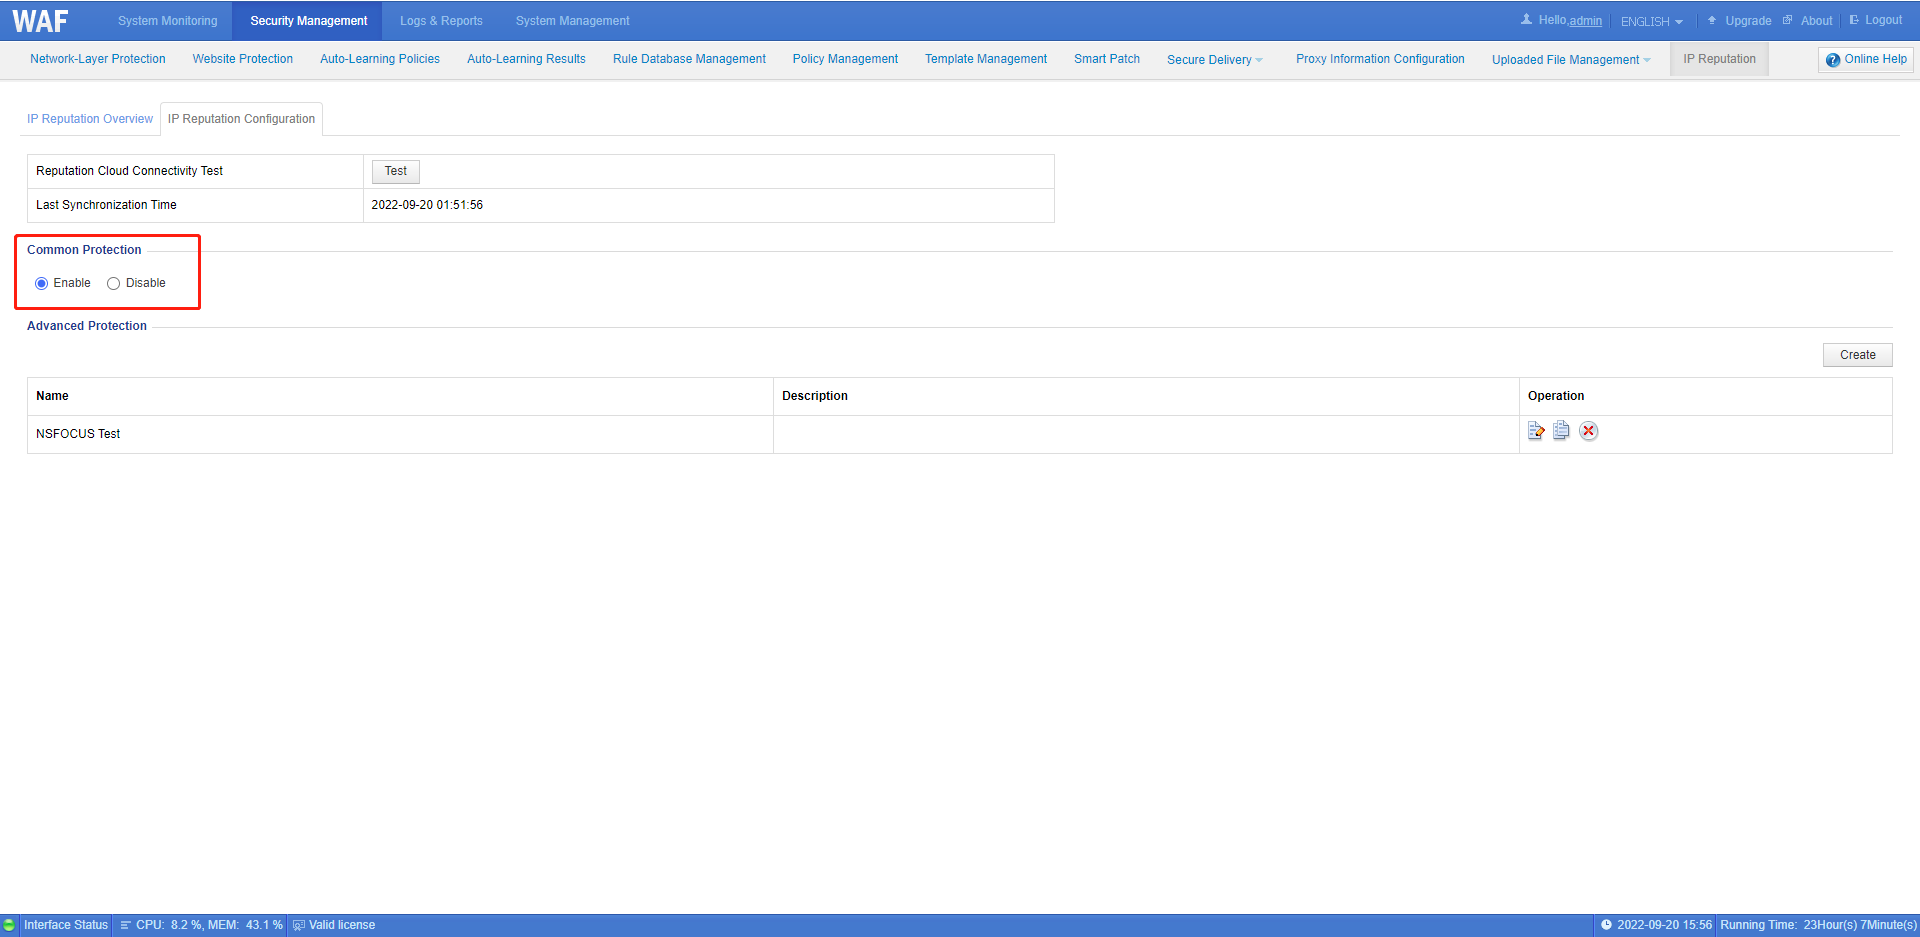
NSFOCUS WAF IP Reputation includes two modules: Common Protection and Advanced Protection.
1. IP Reputation common protection blocks HTTP/HTTPS requests from high-risk IP addresses. When the client IP matches the high-risk IP addresses, NSFOCUS WAF will block requests accordingly and record corresponding security logs.
The matching times of the blacklist can be obtained from Reputation Match Count in the Last One Week. It reflects the consumption of the IP Reputation Data Feed.
IP Reputation common protection configuration method:
Click Security Management > IP Reputation > IP Reputation Configuration > Enable Common Protection
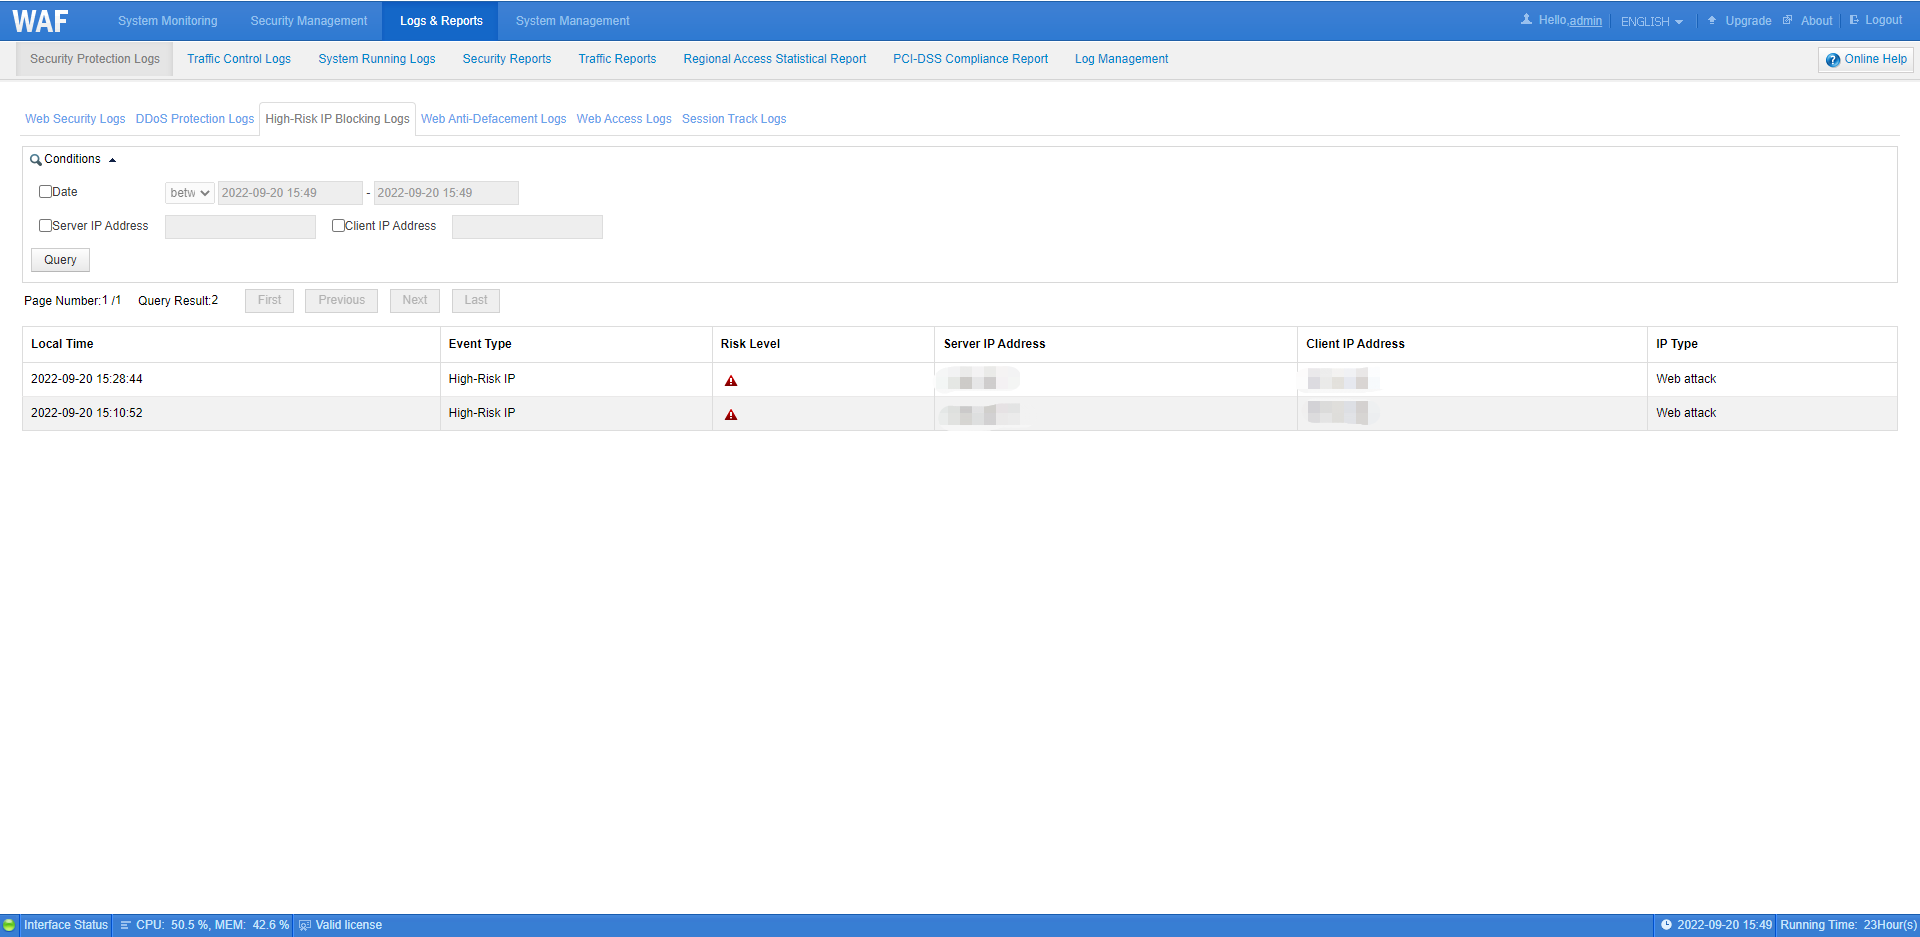
Protection logs can be viewed at Logs & Reports > High-Risk IP Blocking Logs
2. IP Reputation advanced protection is the GEOIP function. NSFOCUS WAF has a built-in GEOIP library. NSFOCUS WAF can configure policies to block requests from IP addresses of specified areas. The client IP address displayed in security logs is also based on this GEOIP library.
IP Reputation advanced protection configuration method:
Step 1: Click Security Management > IP Reputation > IP Reputation Configuration and click the Create button in the upper right corner of the table.
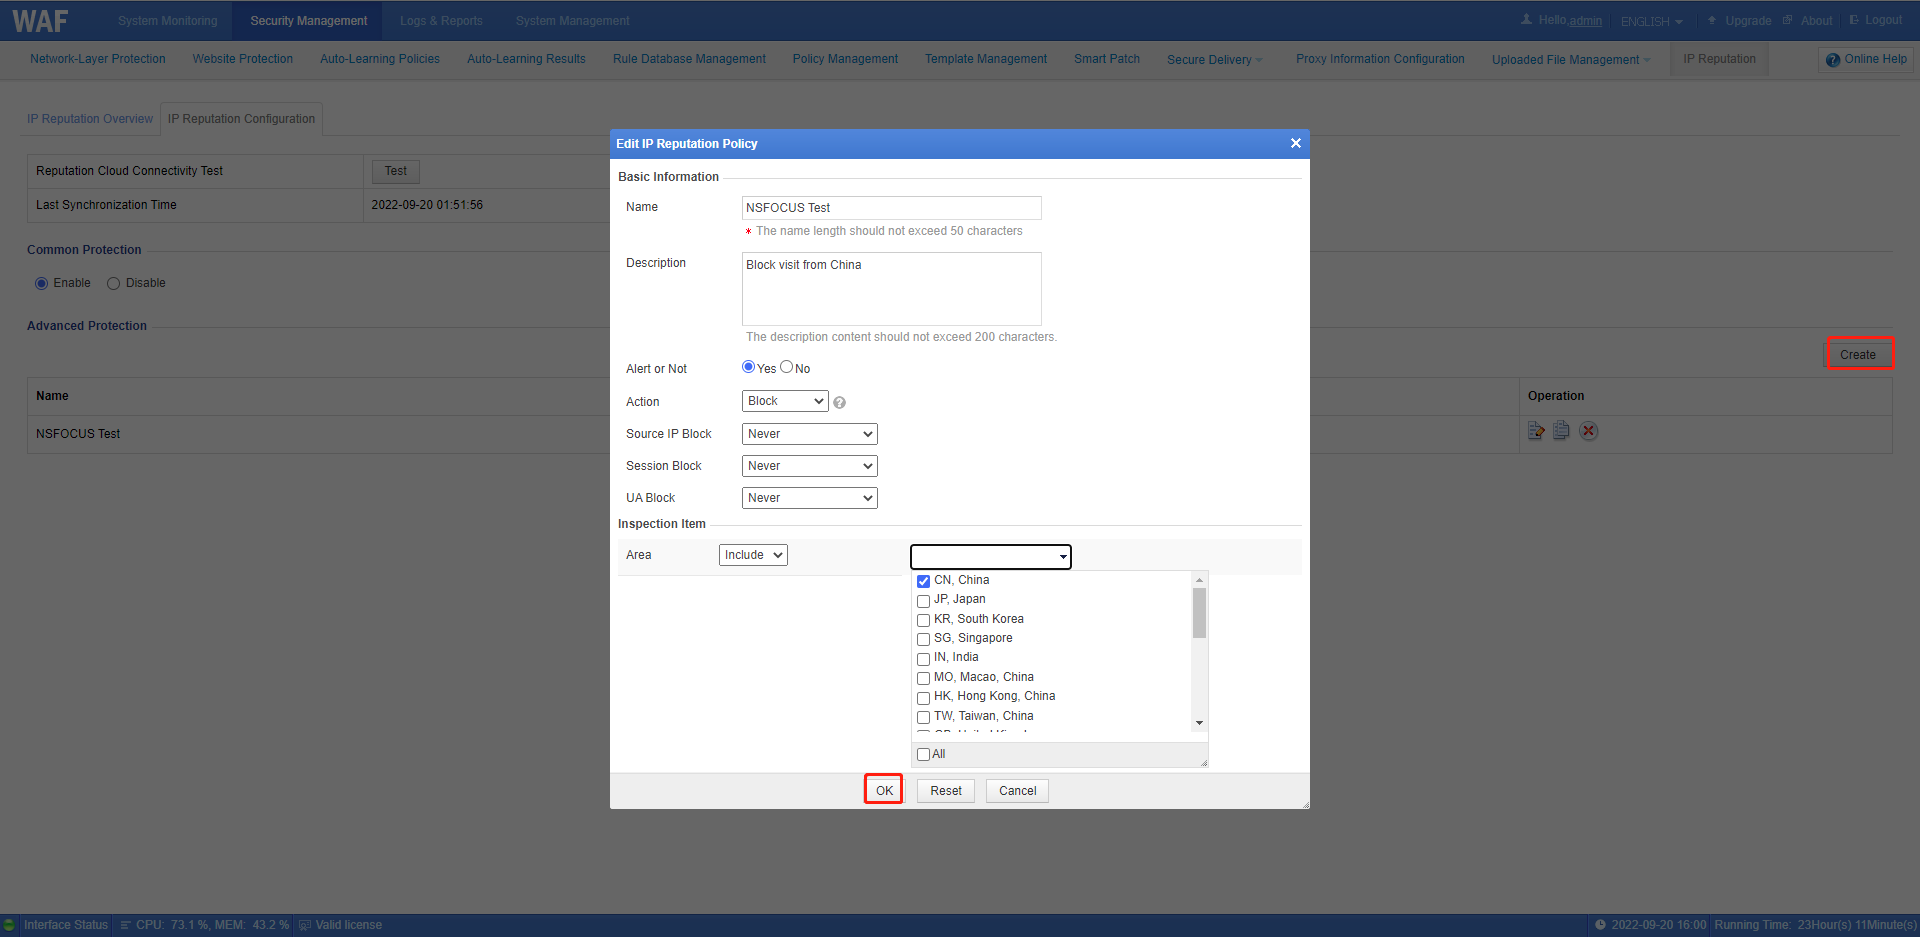
Step 2: Edit the policy
- Name: User-defined
- Description: User-defined
- Alert or Not: Choose Yes or No
- Action: Pass, Block, Accept, Redirection or Disguise
- Area: Include or Exclude
Tips:
- For more details about action, please view: NSFOCUS WAF Protection Actions
- NSFOCUS WAF GEOIP library includes 21 countries and regions
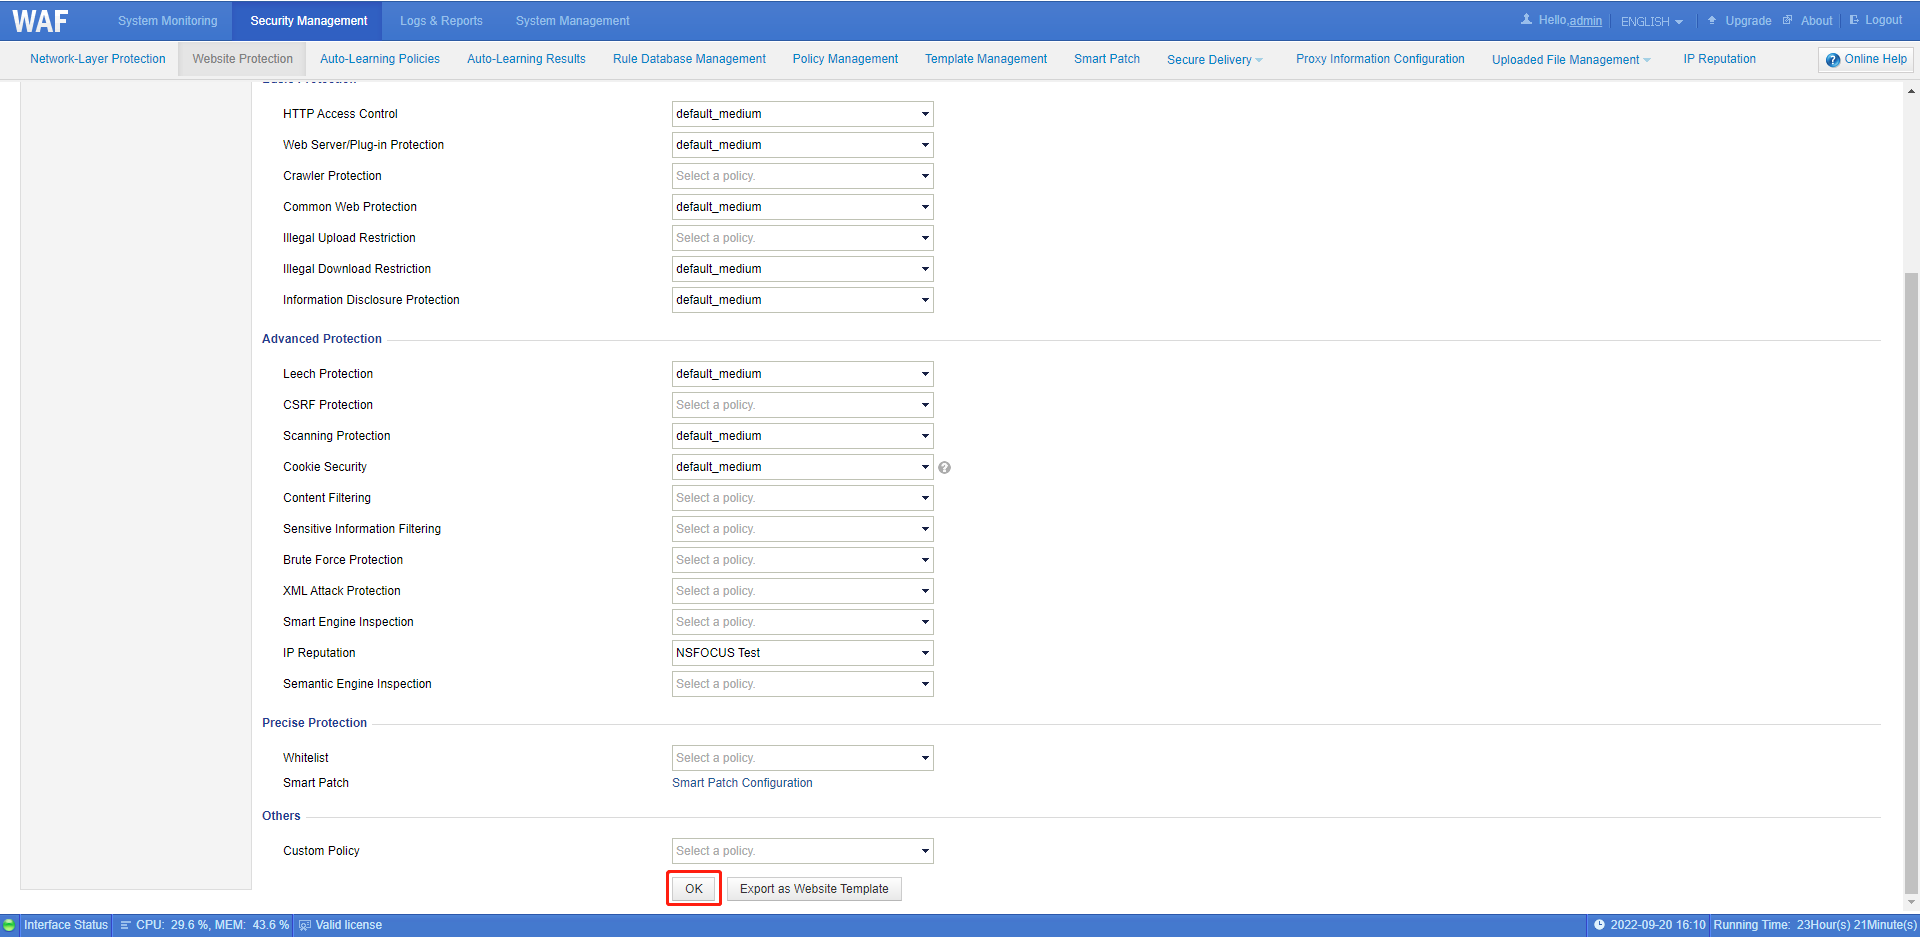
Step 3: Enable IP Reputation policy on web security protection configurations
Configuration method: Click Security Management > Website Protection >protected Website Group > Web Security Protection > IP Reputation, and select the created policy and click OK.

Protection logs can be viewed at Logs & Reports > Security Protection Logs > Web Security Logs
