
This document will guide you through the process of leveraging programmable rules in ADS to customize your protection capabilities. Unlike static solutions, the programmable defense allows you to create custom rules and policies that respond to attacks in real time, providing more precise and effective protection. NSFOCUS ADS has incorporated this functionality in its F05 version, empowering users to tailor their defense to their specific needs.
1. Editing Protection Policies
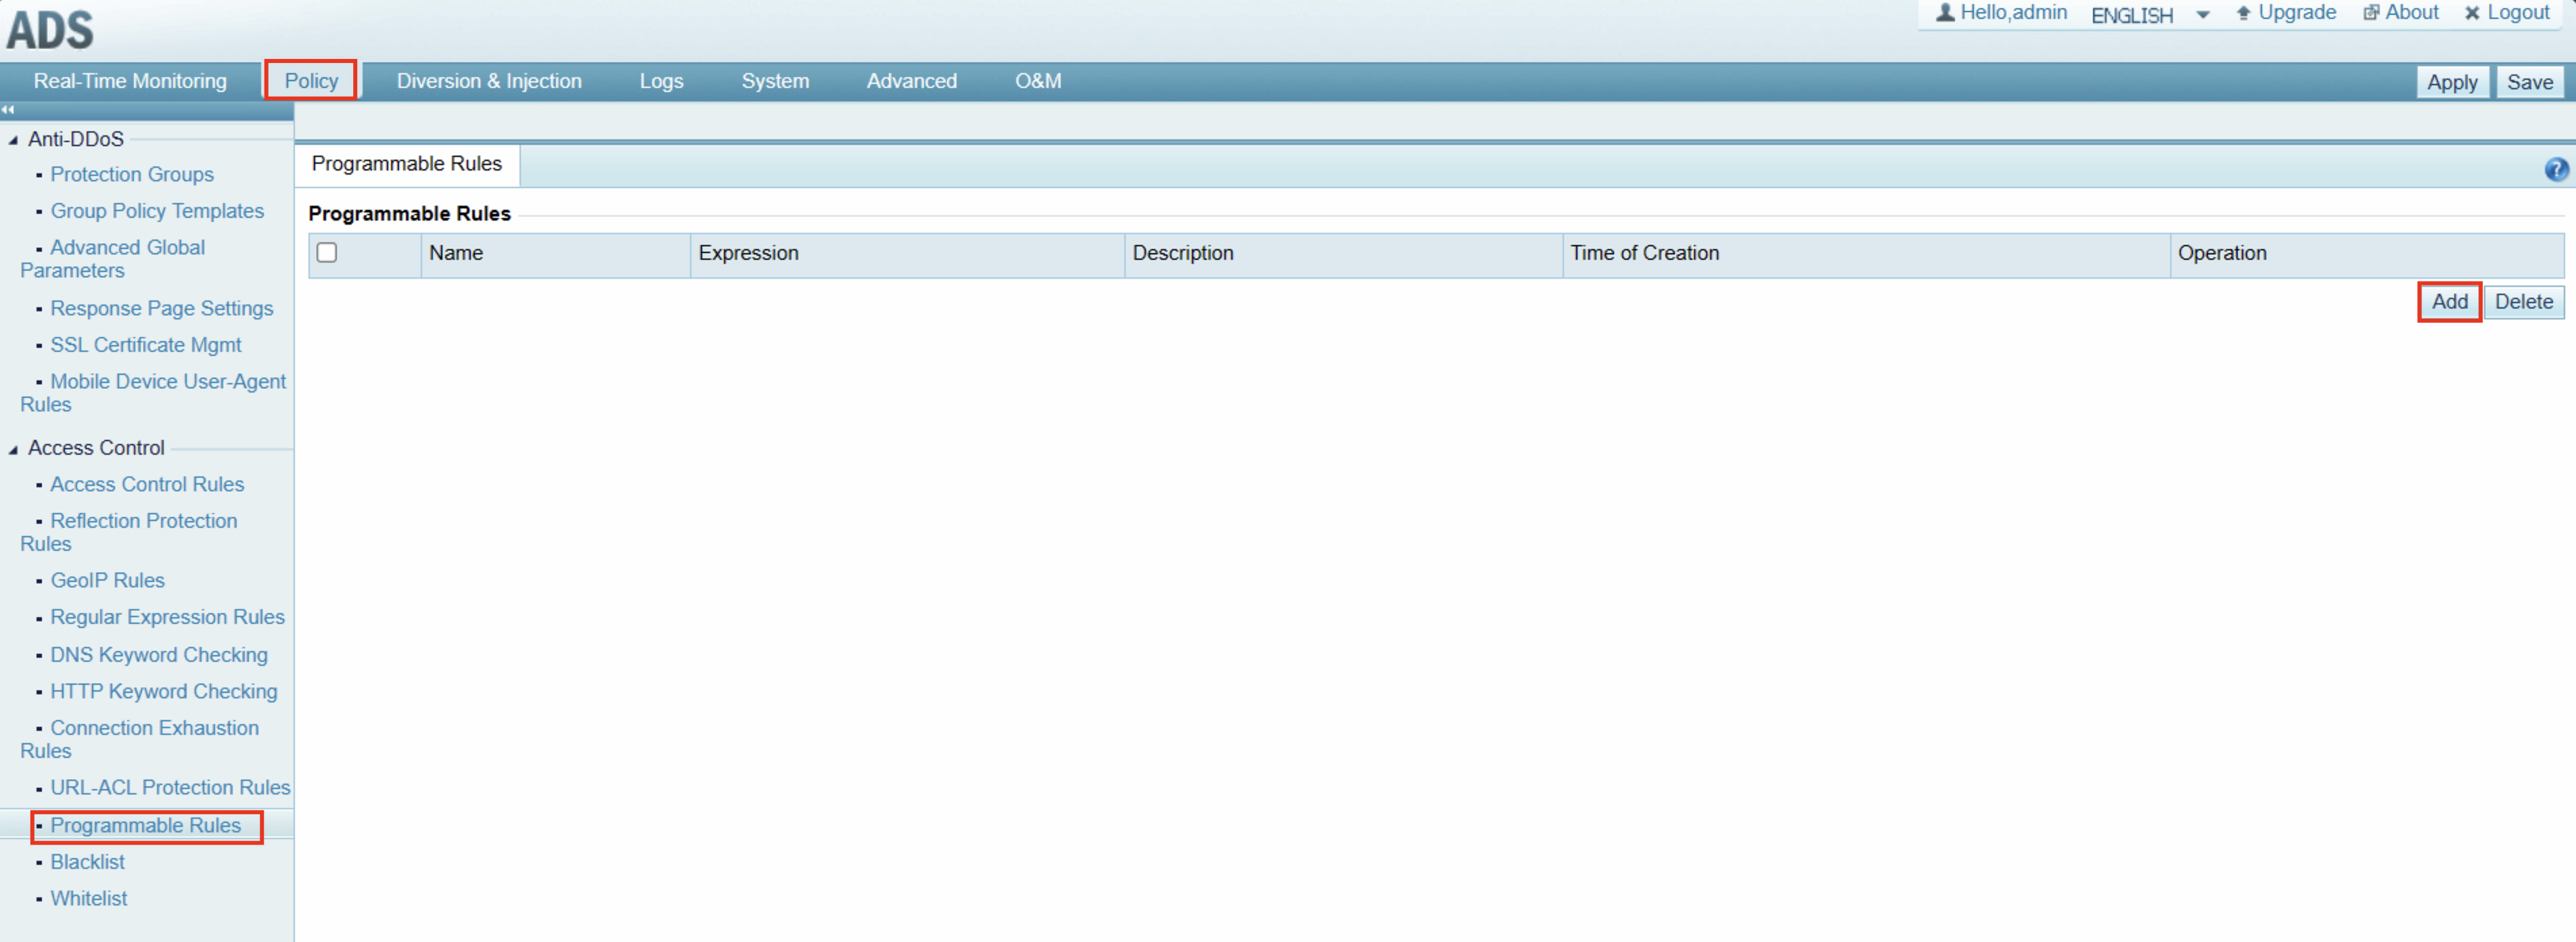
You can add new policies in ADS by navigating to Policy > Programmable Rules.
Within the policy editing interface, you can name your policy and define its rules.
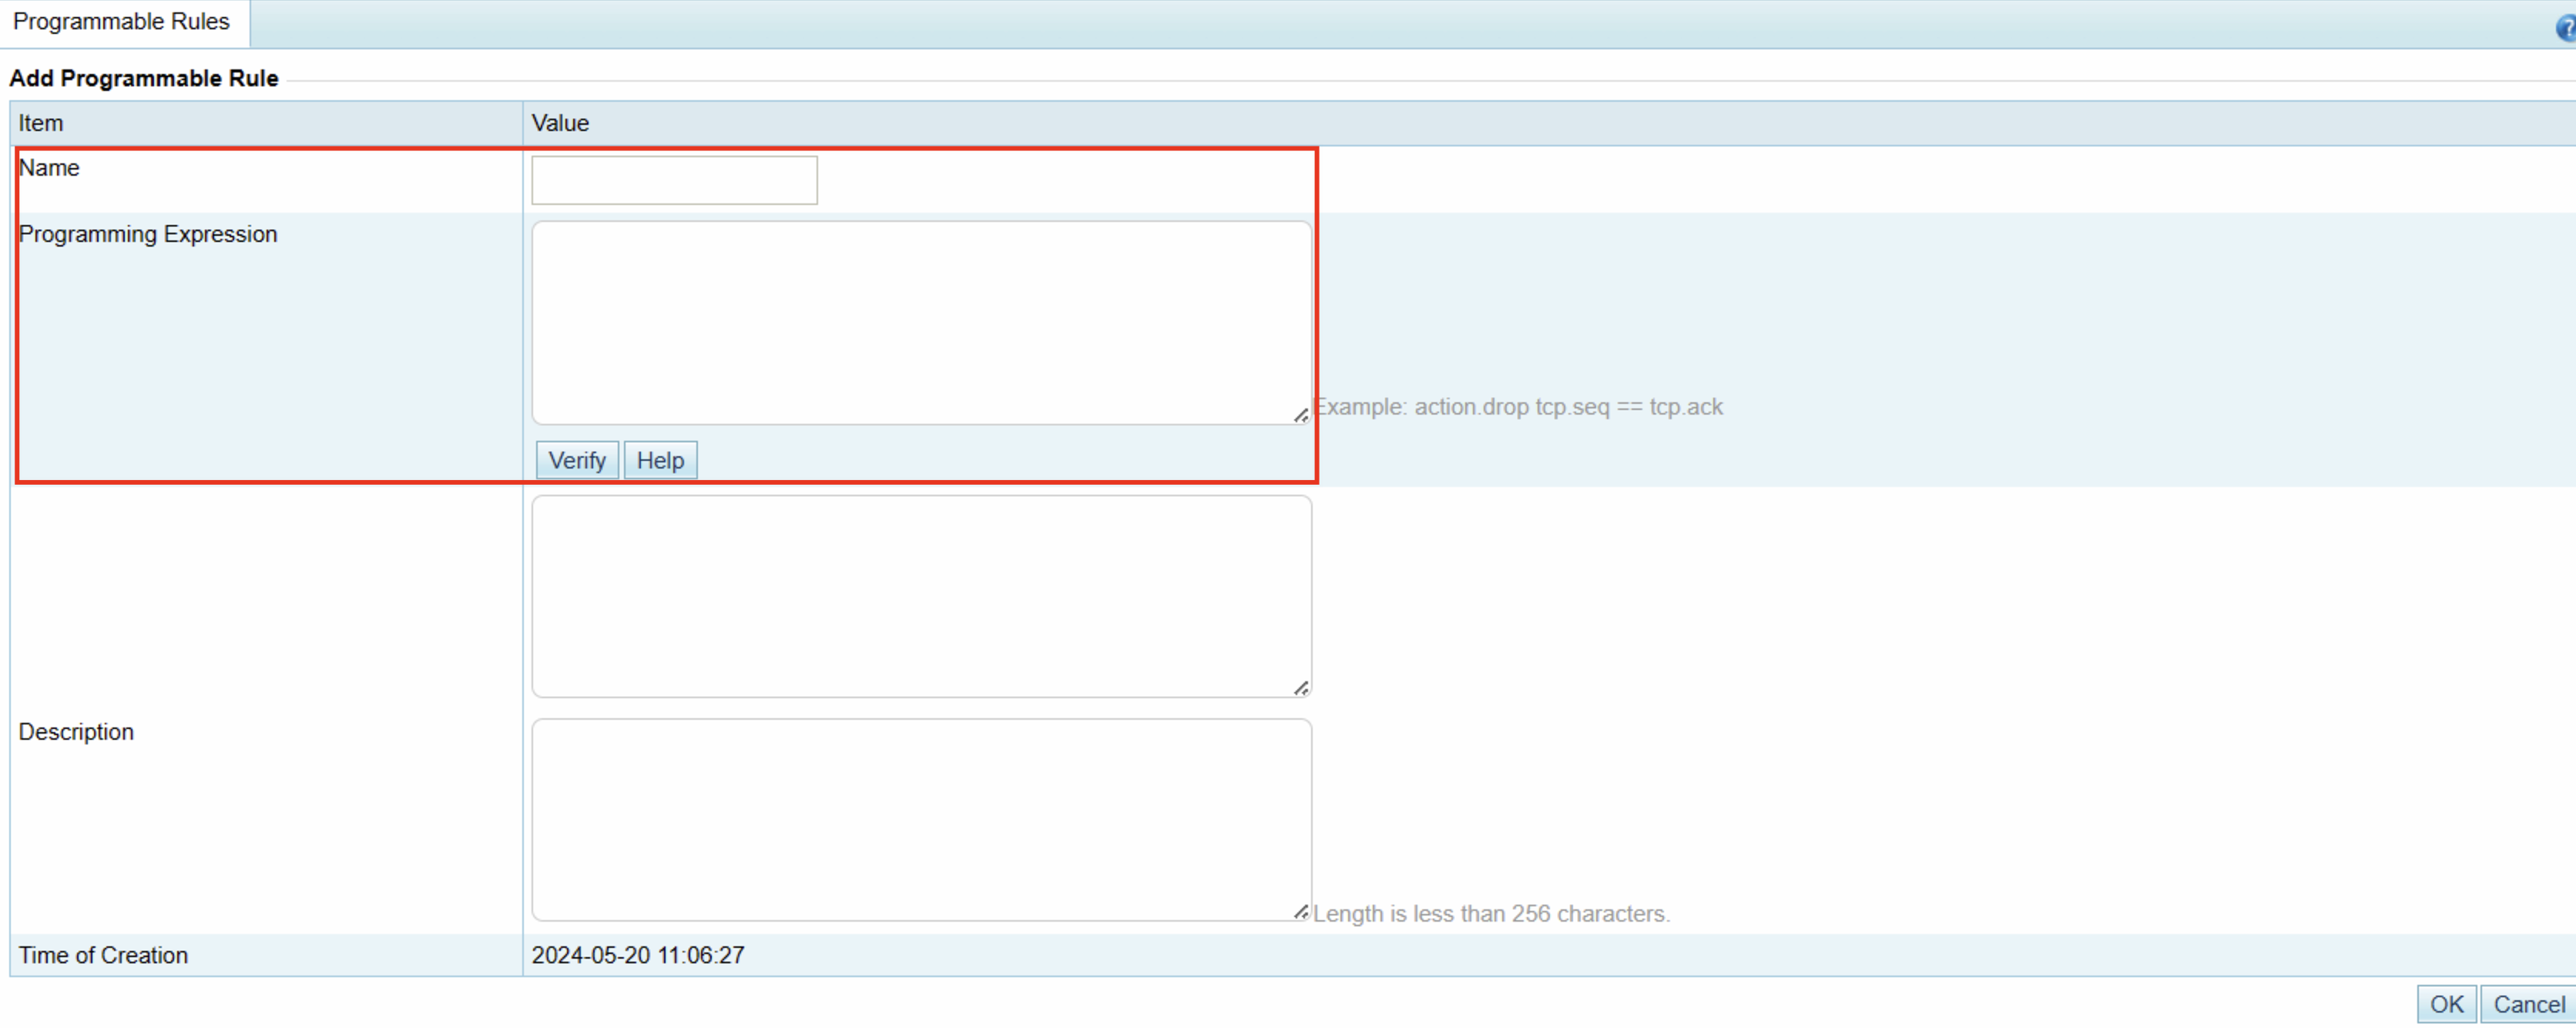
Click the Help button to access the help documentation for guidance on writing policy content. ADS utilizes a Wireshark-like syntax. For example, to drop TCP packets with a length of 100 bytes, you would write:
action.drop tcp.len == 100
After writing your policy, click Verify to validate the syntax. If the syntax is correct, the message “Successful” will be displayed in the box below.
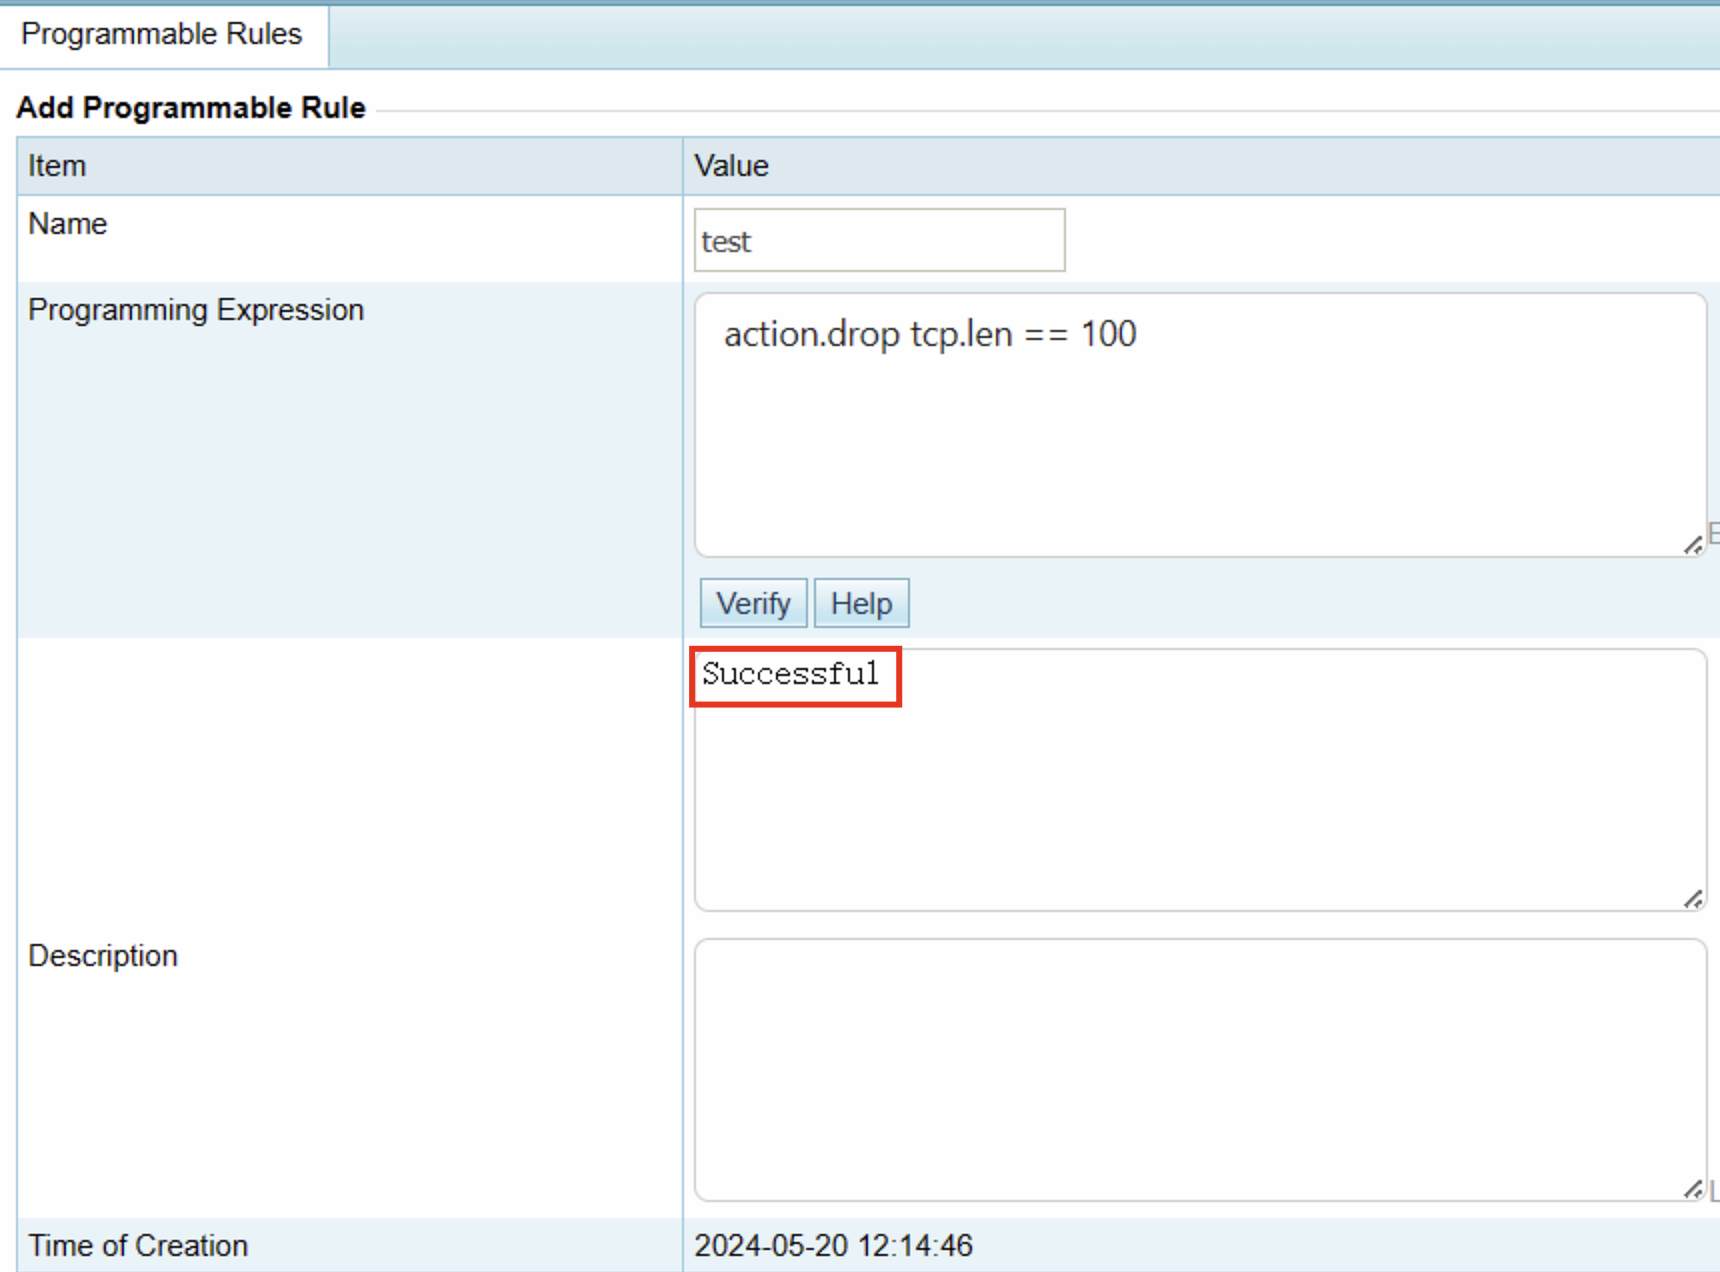
Finally, click OK to save your policy.
2. Applying Policies to Protection Groups
The policies saved in Step 1 need to be manually applied to the corresponding protection groups to take effect.
Note: We recommend applying only one programmable policy per protection group.
To apply a policy, navigate to Policy > Protection Groups and select the group you wish to edit. Click the Edit button in the Protection Policy column to enter the editing page.

Locate the Programmable Rule section on the editing page. Here, you can enable the policy by clicking the plus sign and selecting the desired policy content.


Choose the required policy and click OK to save your selection.
Next, click the Next button at the bottom of the policy editing page until you reach the page with the Finish button. Click Finish to complete the editing process. Finally, click the Apply and Save buttons in the upper right corner of the ADS page to save and apply the edited policy.
This concludes the policy editing process. You can now test your customized protection policy.